First-time Git setup
Once you've installed Git, you should define some important settings before you starting using Git.
Info
We assume that you will want to set the git configuration for all repositories owned by your user.
Therefore, we use the --global flag.
Configuration files can be set for a single repository or the whole computer by replacing --global with --local or --system respectively.
-
Define your user name and email address. These details are included in every commit that you create.
2. Define the text editor that Git should use for tasks such as writing commit messages:git config --global user.name "My Name" git config --global user.email "my.name@some-university.edu.au"NOTE: on Windows you need to specify the full path to the editor:
Tip
Please see Choosing your Git editor for details.
-
By default, Git will create a branch called
masterwhen you create a new repository. You can set a different name for this initial branch: -
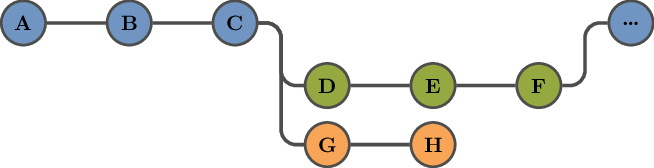
Ensure that repository histories always record when branches were merged:
This prevents Git from "fast-forwarding" when the destination branch contains no new commits. For example, it ensures that when you merge the green branch into the blue branch (as shown below) it records that commits D, E, and F came from the green branch.
-
Adjust how Git shows merge conflicts:
This will be useful when we look at how to use branches and how to resolve merge conflicts.
Info
If you use Windows, there are tools that can improve your Git experience in PowerShell.
There are also tools for integrating Git into many common text editors. See Git in other environments, Appendix A of the Pro Git book.